
“Only he who can see the invisible can do the impossible.” -Frank Gaines
Ever since I can remember I used to draw and I was told I was really good, naturally I believed it. Once I reached my Art and Design school of choice, I realized there were a lot more people that were a lot more skilled in the art and design department. Shortly after deciding to major in Industrial Design, I found that other students could draw more accurate forms, volumes, and actual ideas (drawings with thought behind them, not just a pretty face), all very quickly. We are talking less than 20 minutes. I shed tears from amazement, rocked and cradled myself in the corner for comfort, had my fragile ego shattered and a very, very narrow scope of “what I don’t know I don’t know,” opened to “knowing what I don’t know.”
The opportunity to work alongside the incredible colleagues I did at my university, drove me to stretch my understanding of everything further than anything initially conceivable of my own capabilities.
Once I understood how much training I needed in order to communicate ideas with visuals instead of words, the whole thought of “drawing as good as him/her,” became much more manageable. It changed from competing with classmates, to competing with myself. That small shift in mindset, radically changed my entire perspective on how to learn and master new skills. Drawing didn’t become a forceful task or stressful, it became quite calming and meditative because the worry of it not being “…as good as/better than…” diminished any fear of it being bad. If the drawing didn’t turn out how I expected, I simply started over and continued working. What usually were mountains to climb became stepping stones, because of the mental reframing of how to become better at a certain skill.
From a human condition standpoint, competition is a foundation of the United States culture (in my individual perspective). Which I believe is good, it drives each other to be better in hopes of achieving a more skilled and knowledgeable society. Of course there are downsides, but I’m focusing on building and achieving a better-self, not criticizing.
Let the work commence. Below is an outline of nearly all the exercises I did over time, with very specific goals in mind while doing them. Most of it, is not pretty, fun, nor exciting. It is grueling, painful, and arduous. Not for those of the feint heart and half-dedicated. Love to all, find inspiration for you, be inspiration for others.
Disclaimer: This is the route I chose to take for bettering my skills as quickly as possible, there could be a thousands other ways for you to achieve the same or even better results.
Introduction: Step 1 - The First Two Weeks

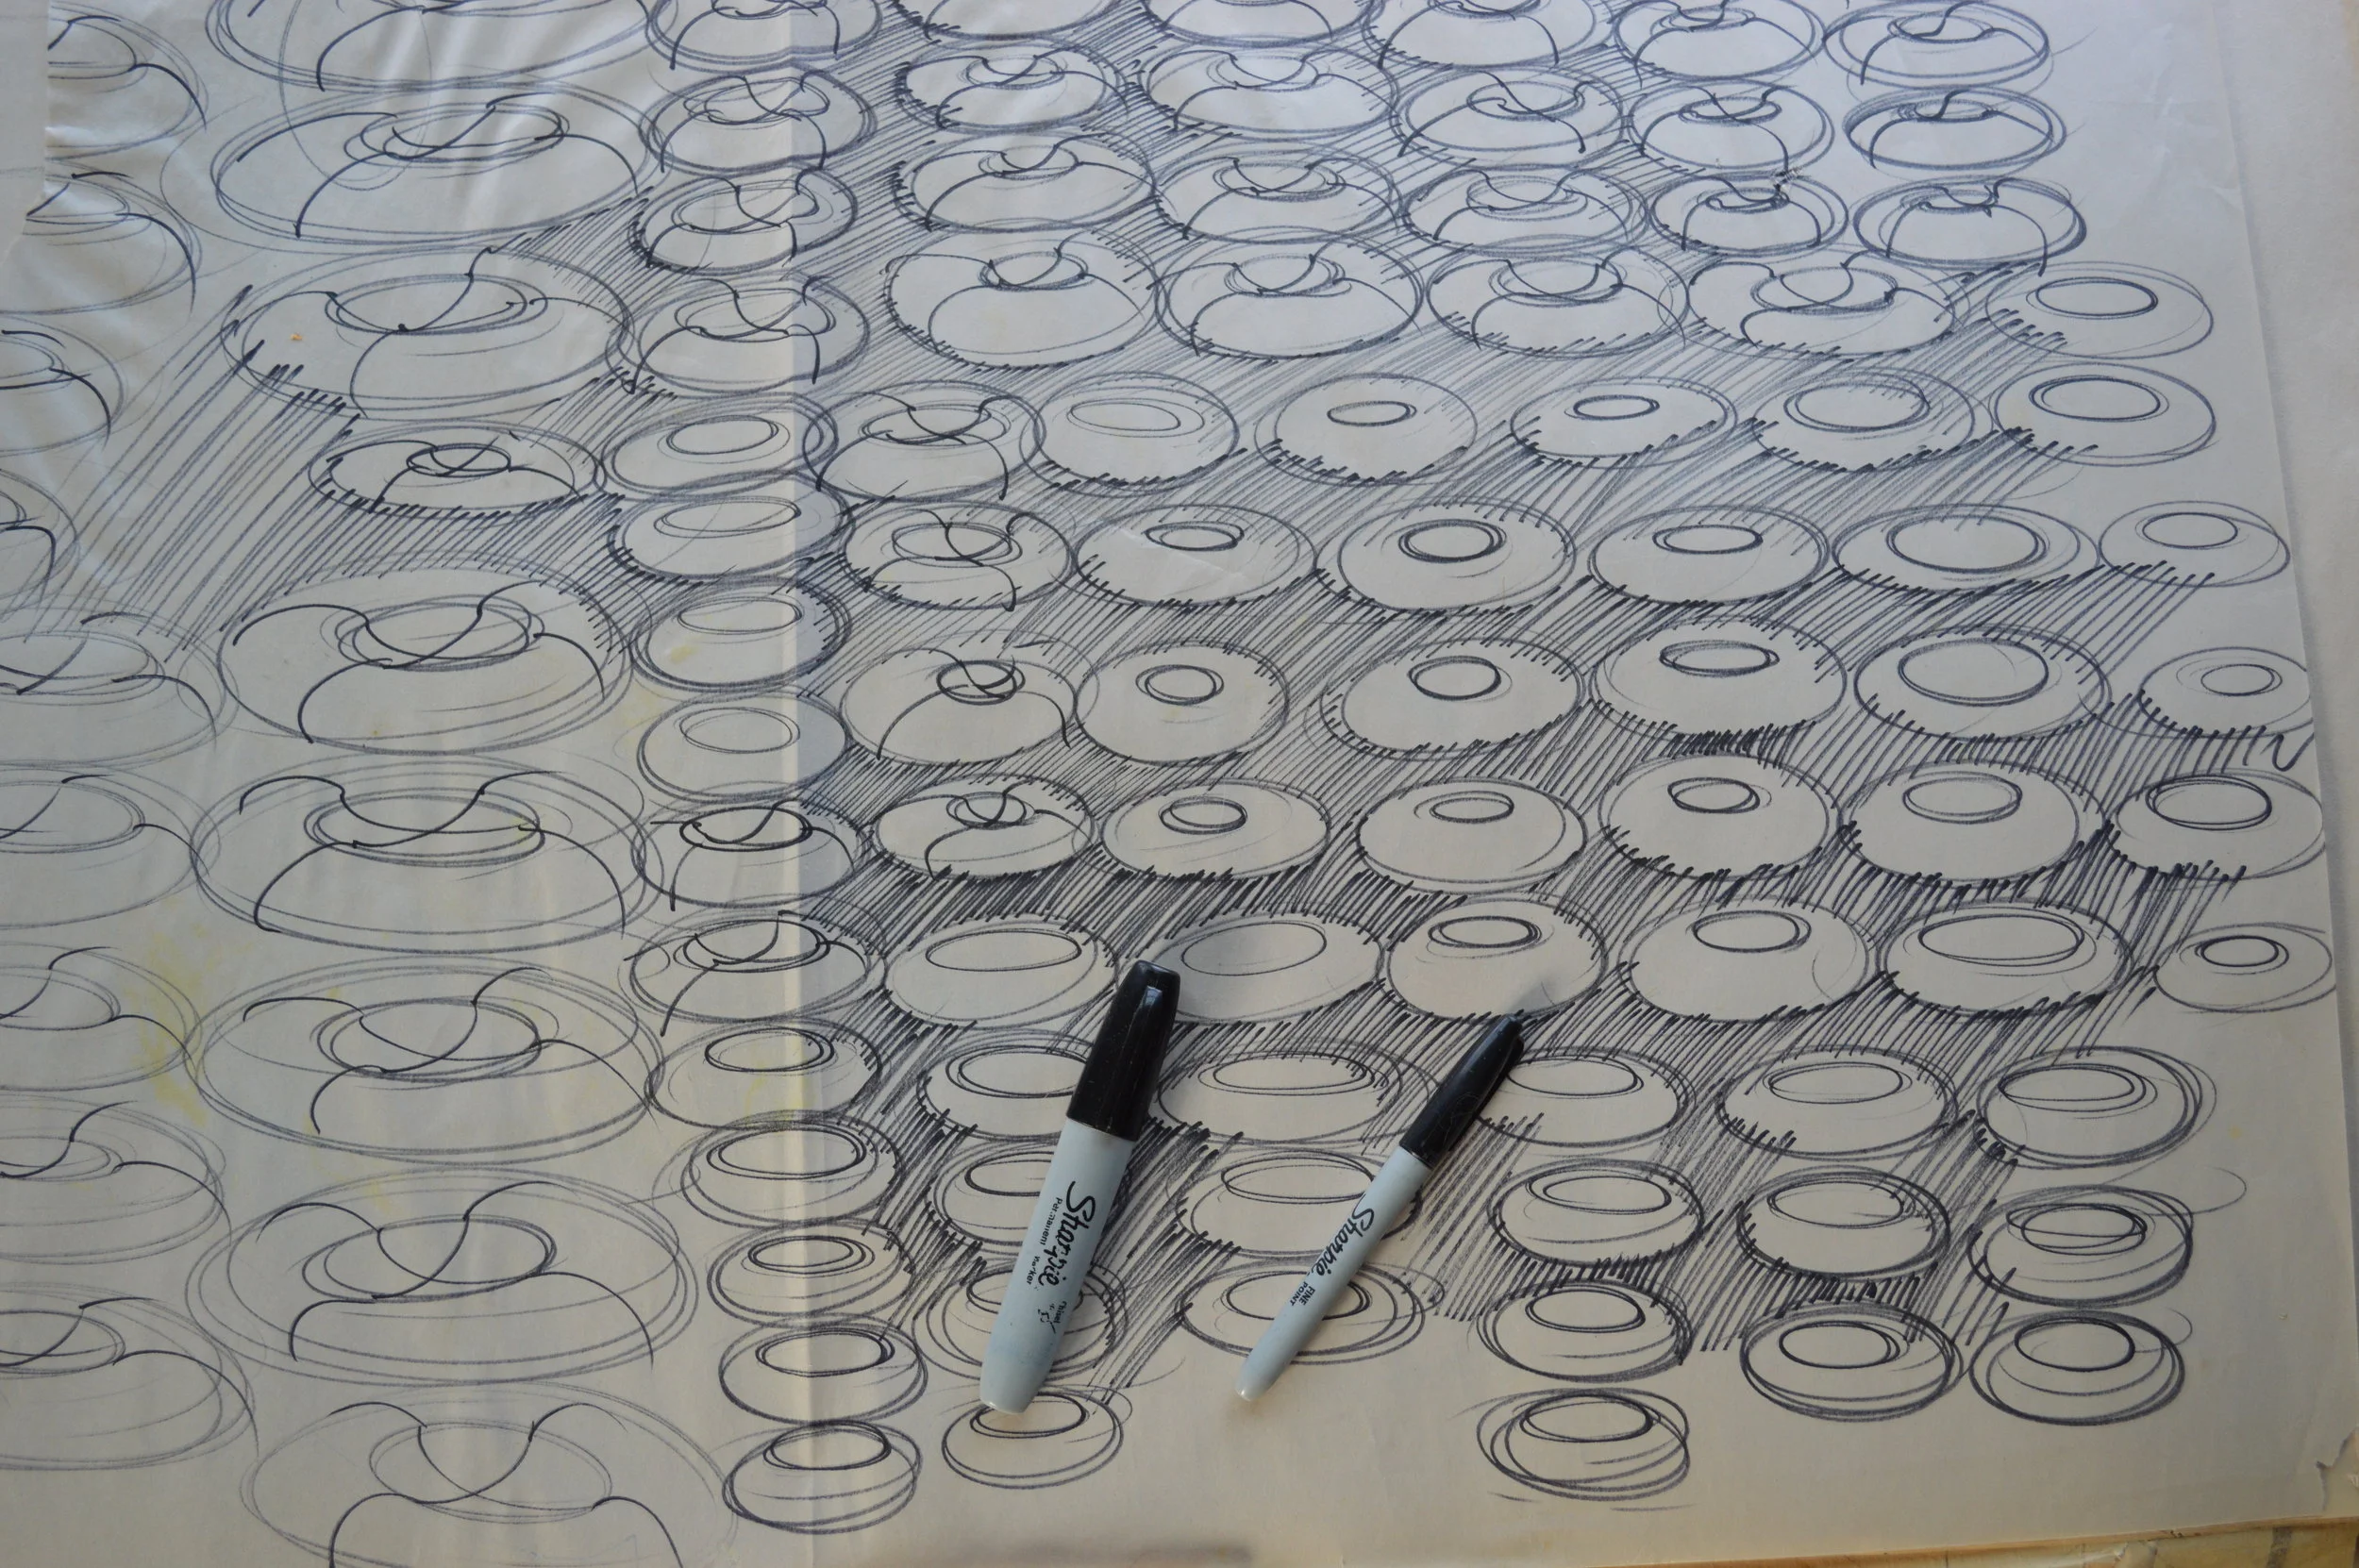
I started with ellipses. One of the more difficult shapes to draw, due to the symmetry. I filled pages, front and back, with ellipses and lines. Using motor skills to get the overall movements consistent requires drawing one ellipse, but focusing on tracing your own lines three times consecutively. After making the ellipse you can give it a generic form with contour lines, making it three dimensional and voluminous, Once the entire page is filled, with ellipses and volume, hatching is good next step to get mechanical like movements for even spacing in between each line constructed.
Materials:
- Cheap ballpoint pen or blue pencil (my tools of choice, digital mediums could work as well)
- 8x11 computer copy paper (a pack of 500 for less than $10)
Action:
- Use a cheap ballpoint pen or blue pencil (my tools of choice) to fill at least three pages per day
- Sketch as many ellipses to fill the page (starting somewhat small, to not waste too much paper)
- Once the page is filled with ellipses draw a smaller ellipse inside it, then begin with contour lines to give form
- Hatch in-between each ellipse, focusing on not going over the ellipse to create a background
- Do this daily for two full weeks
Takeaways:
- Muscle memory for consistent line creation
- Hatching for equi-distant spacing between each line
- Quickly creating the illusion of volume on a two dimensional surface
- Line quality control
STEP 2: LARGE FORMAT

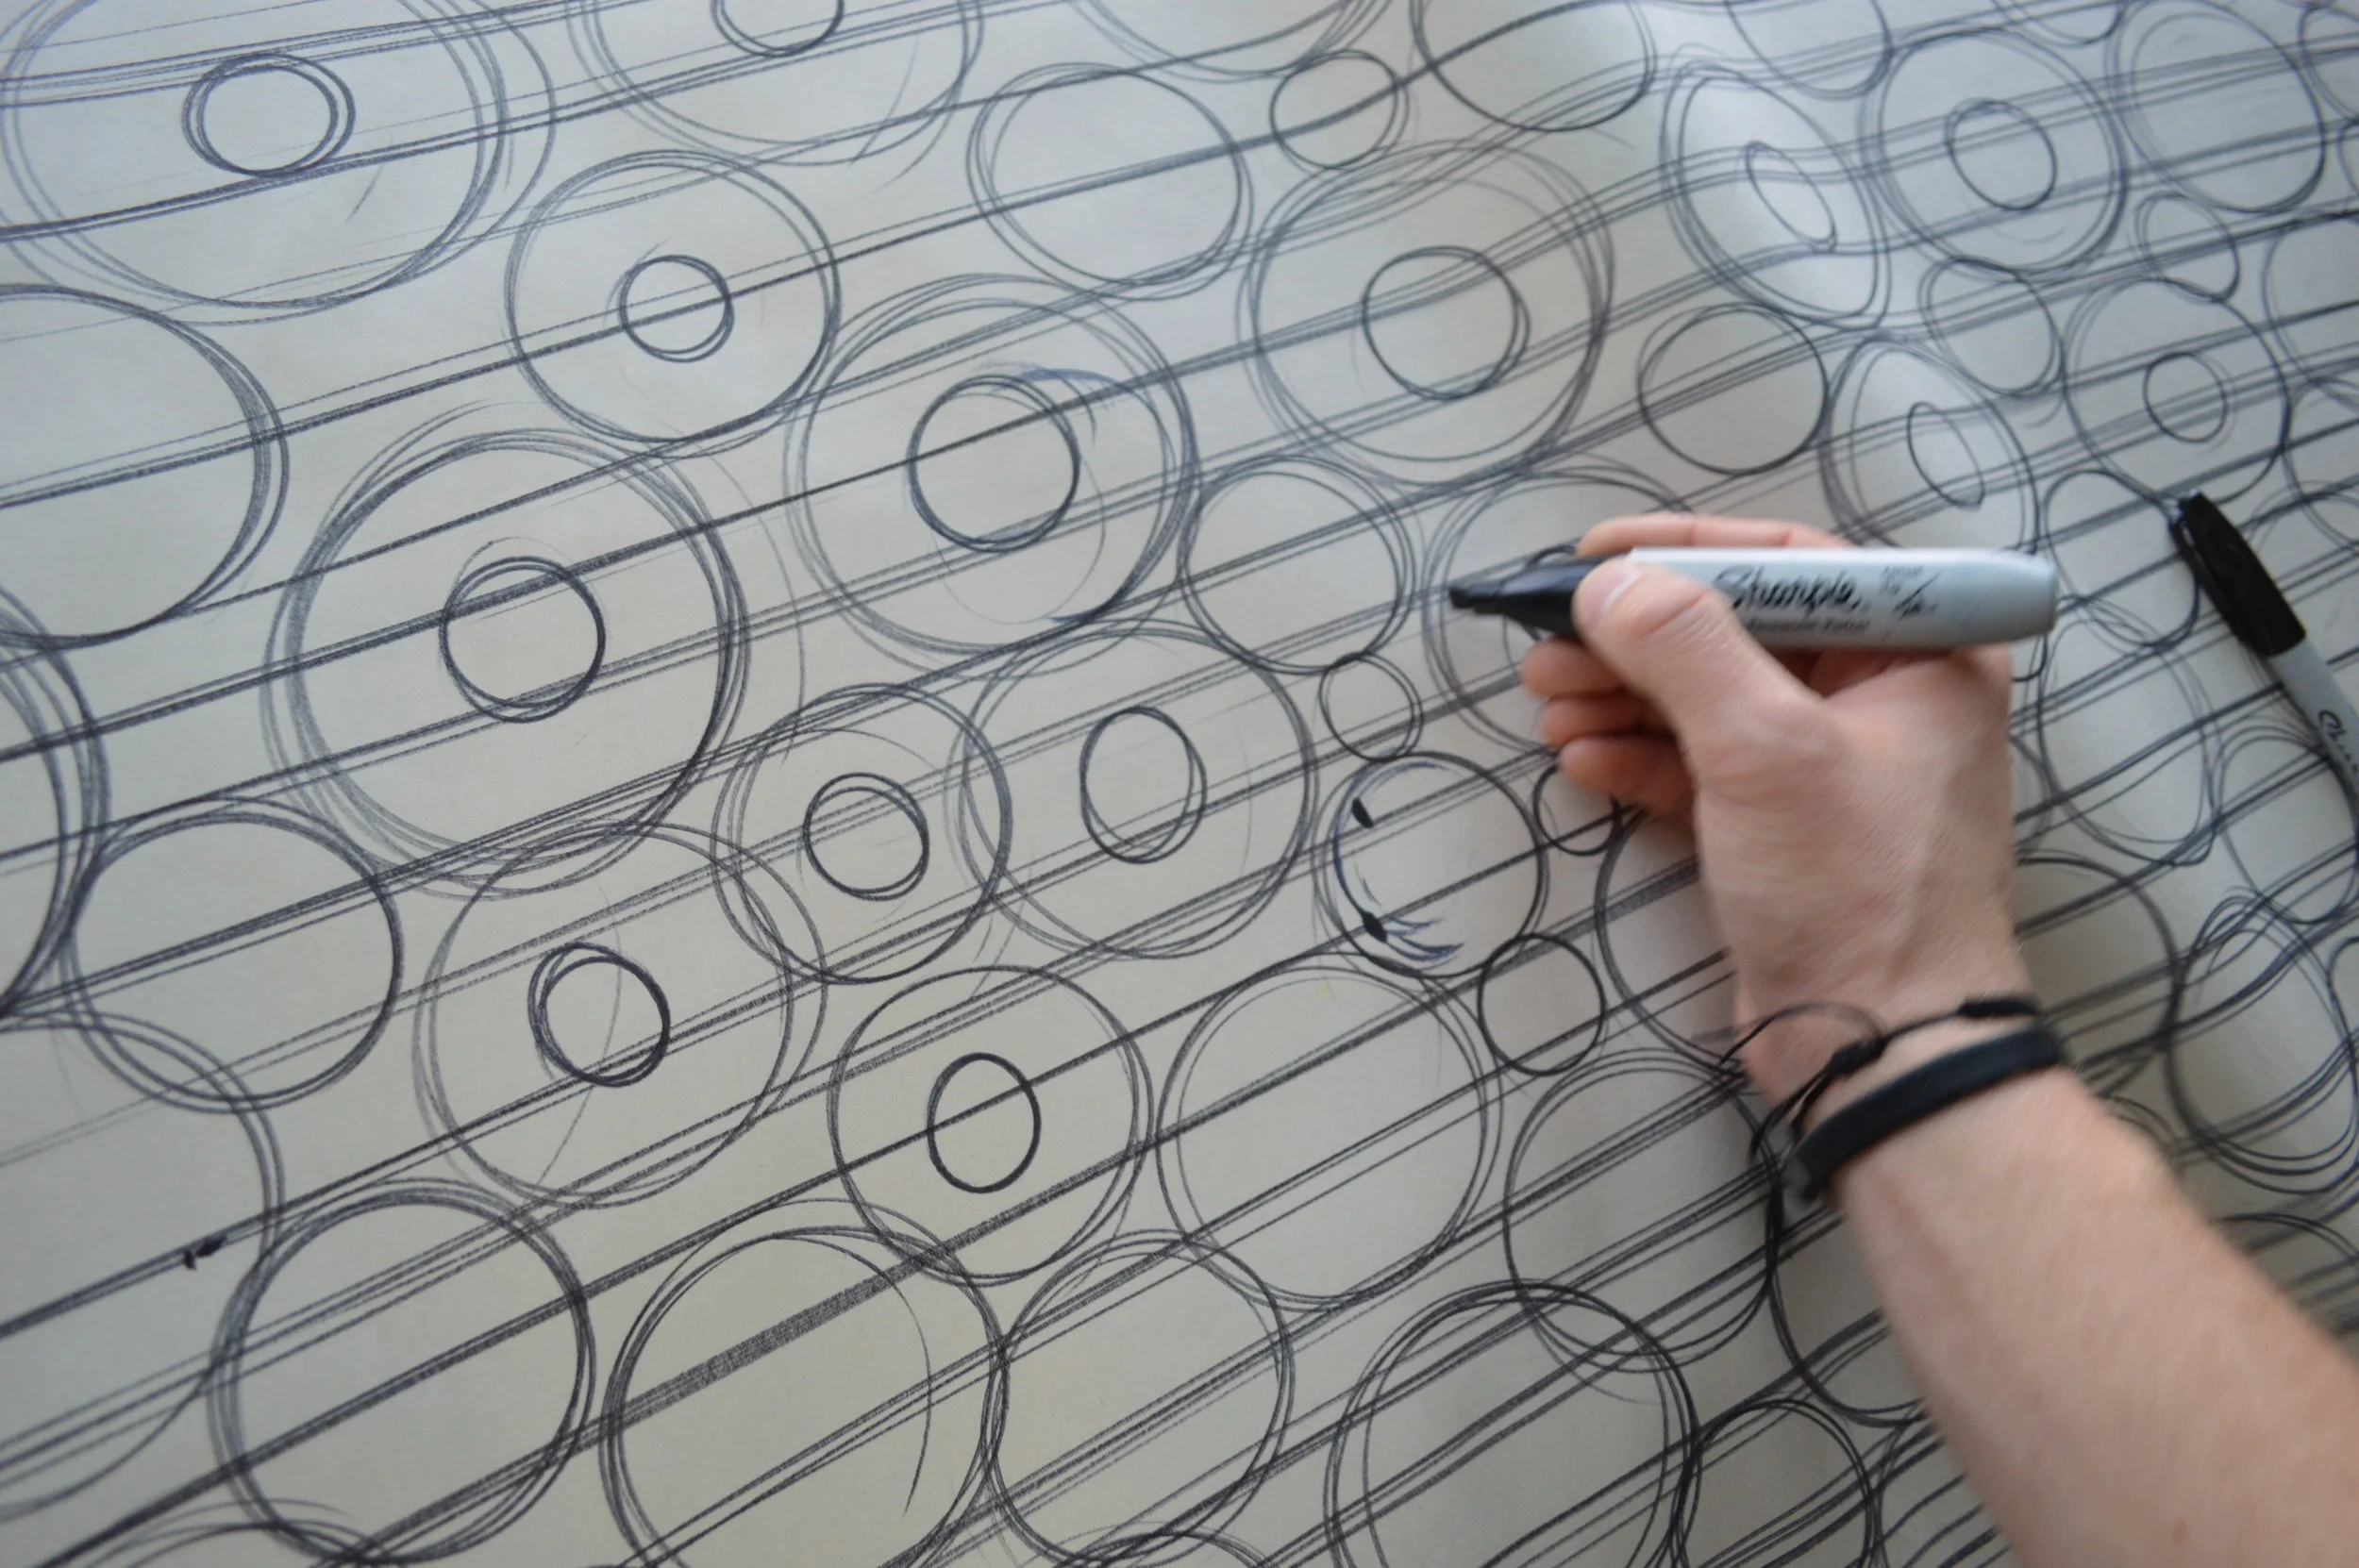
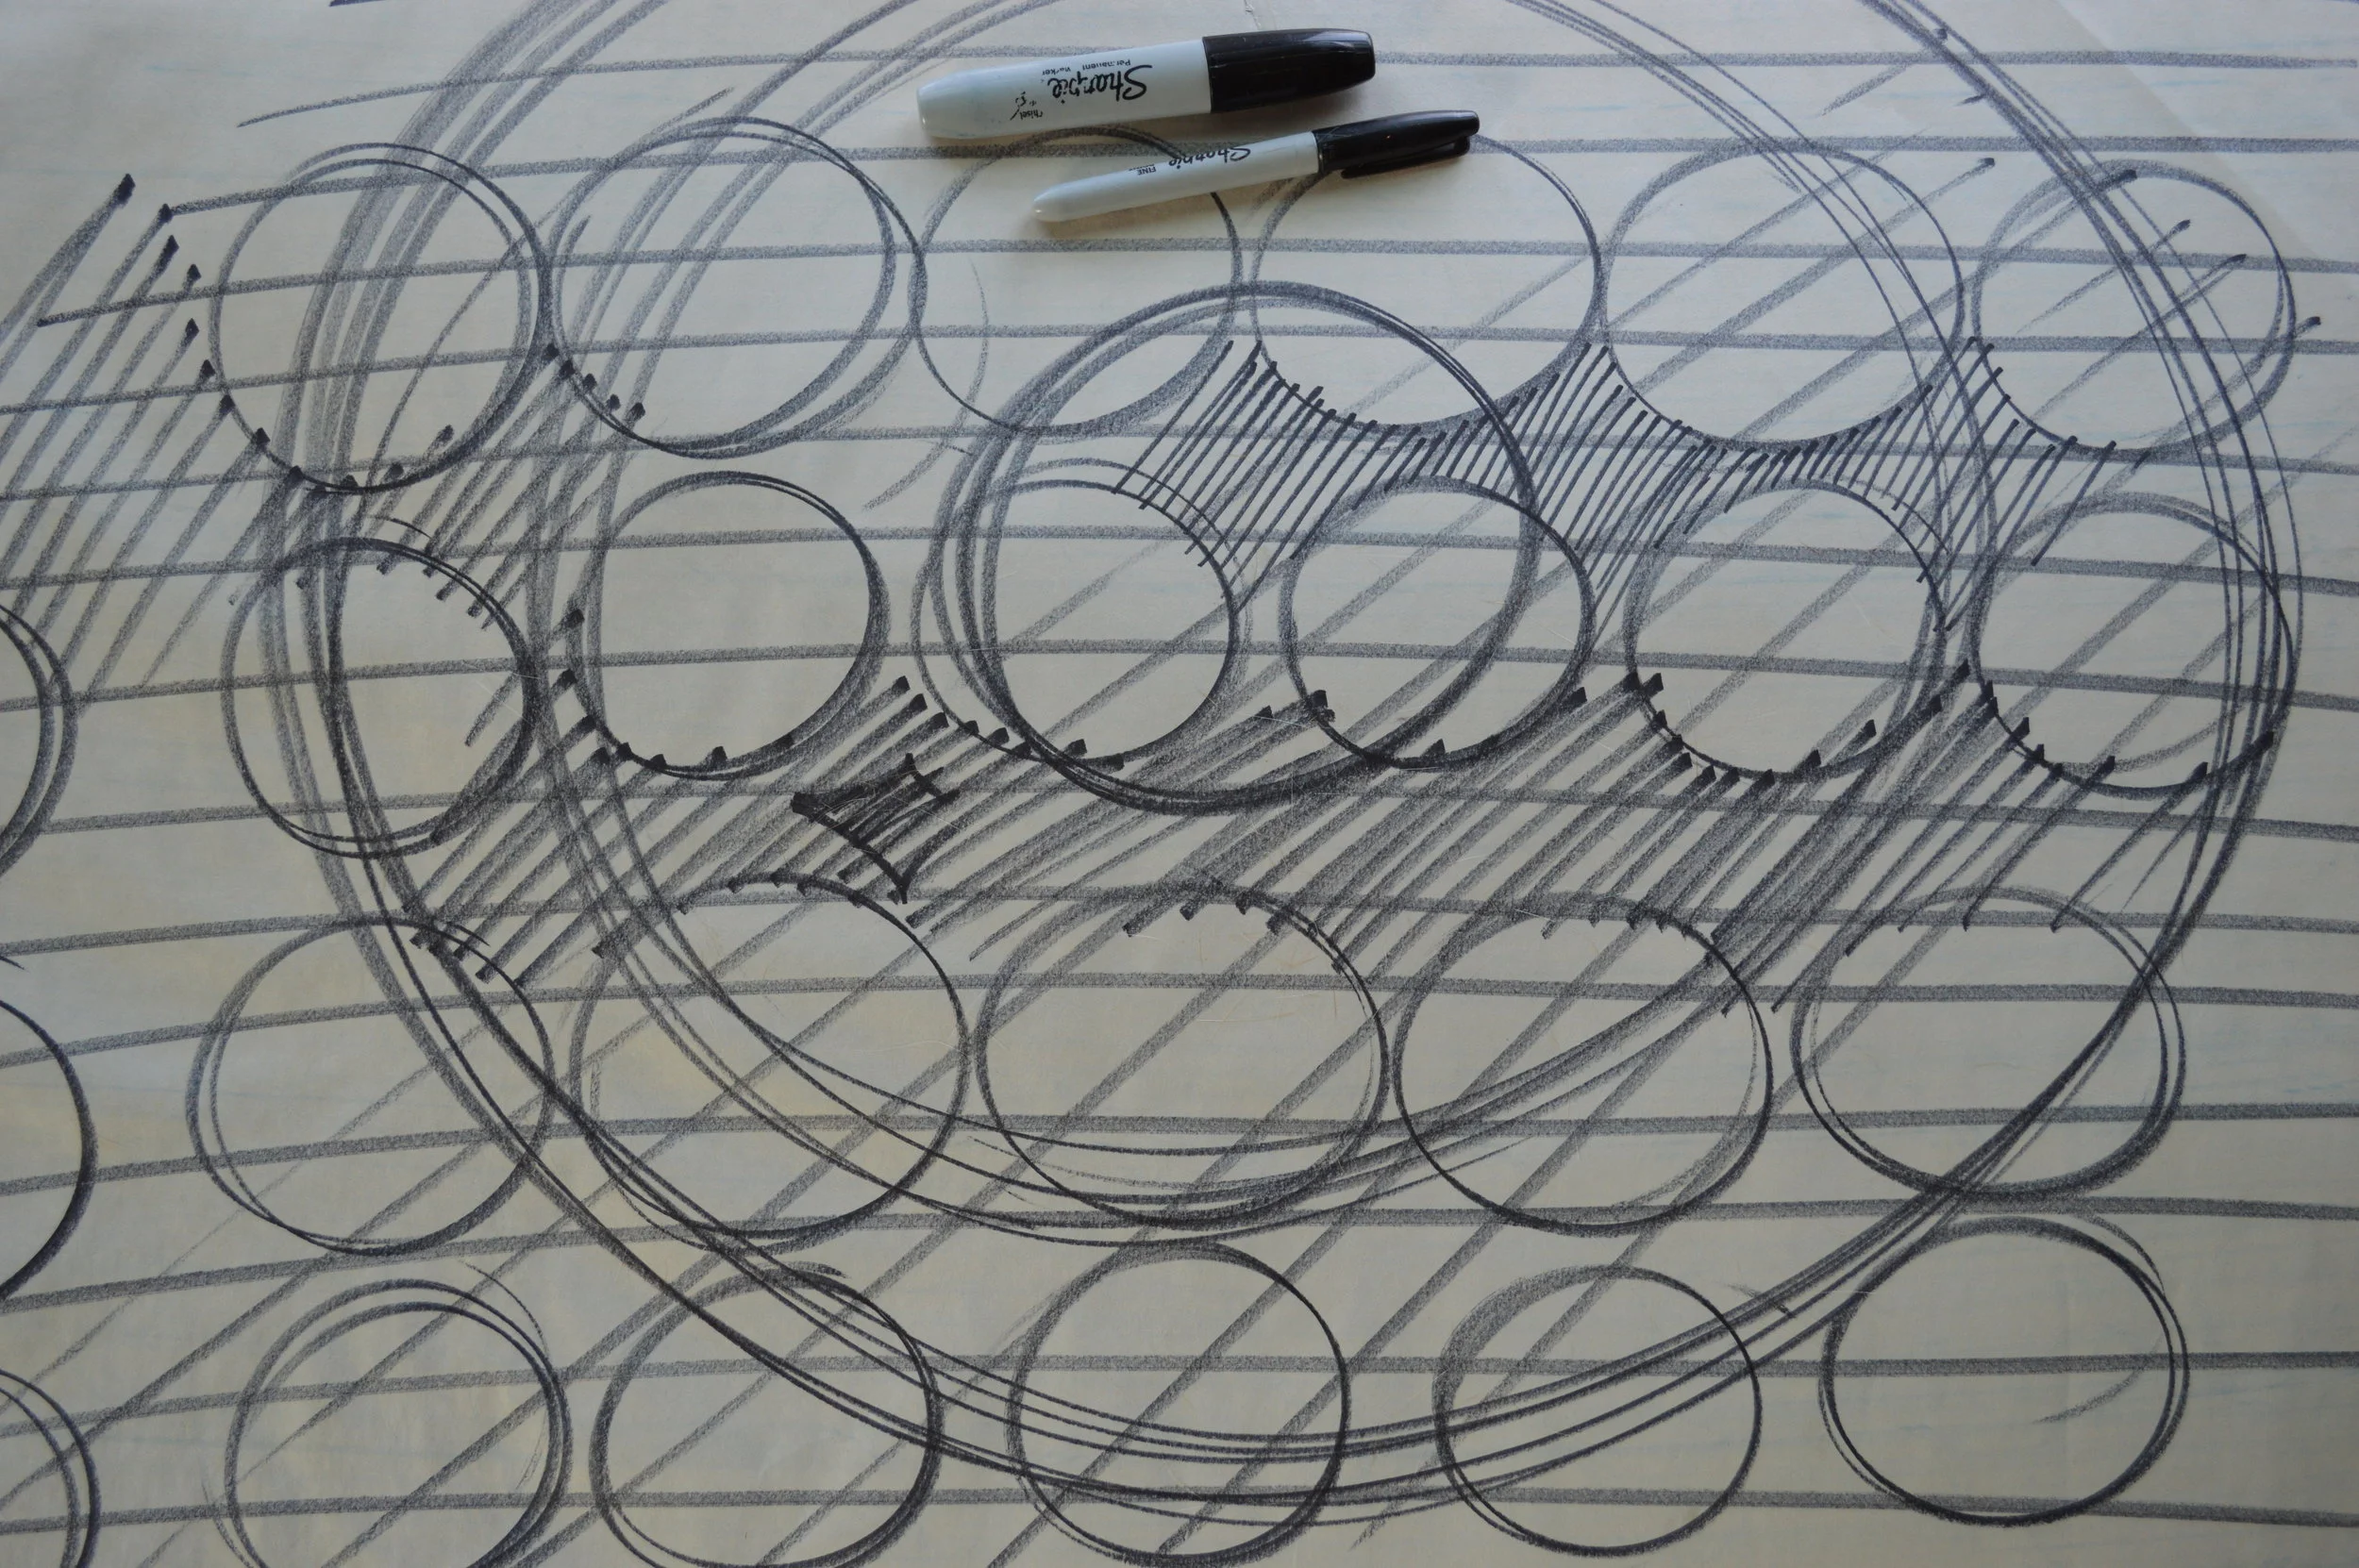
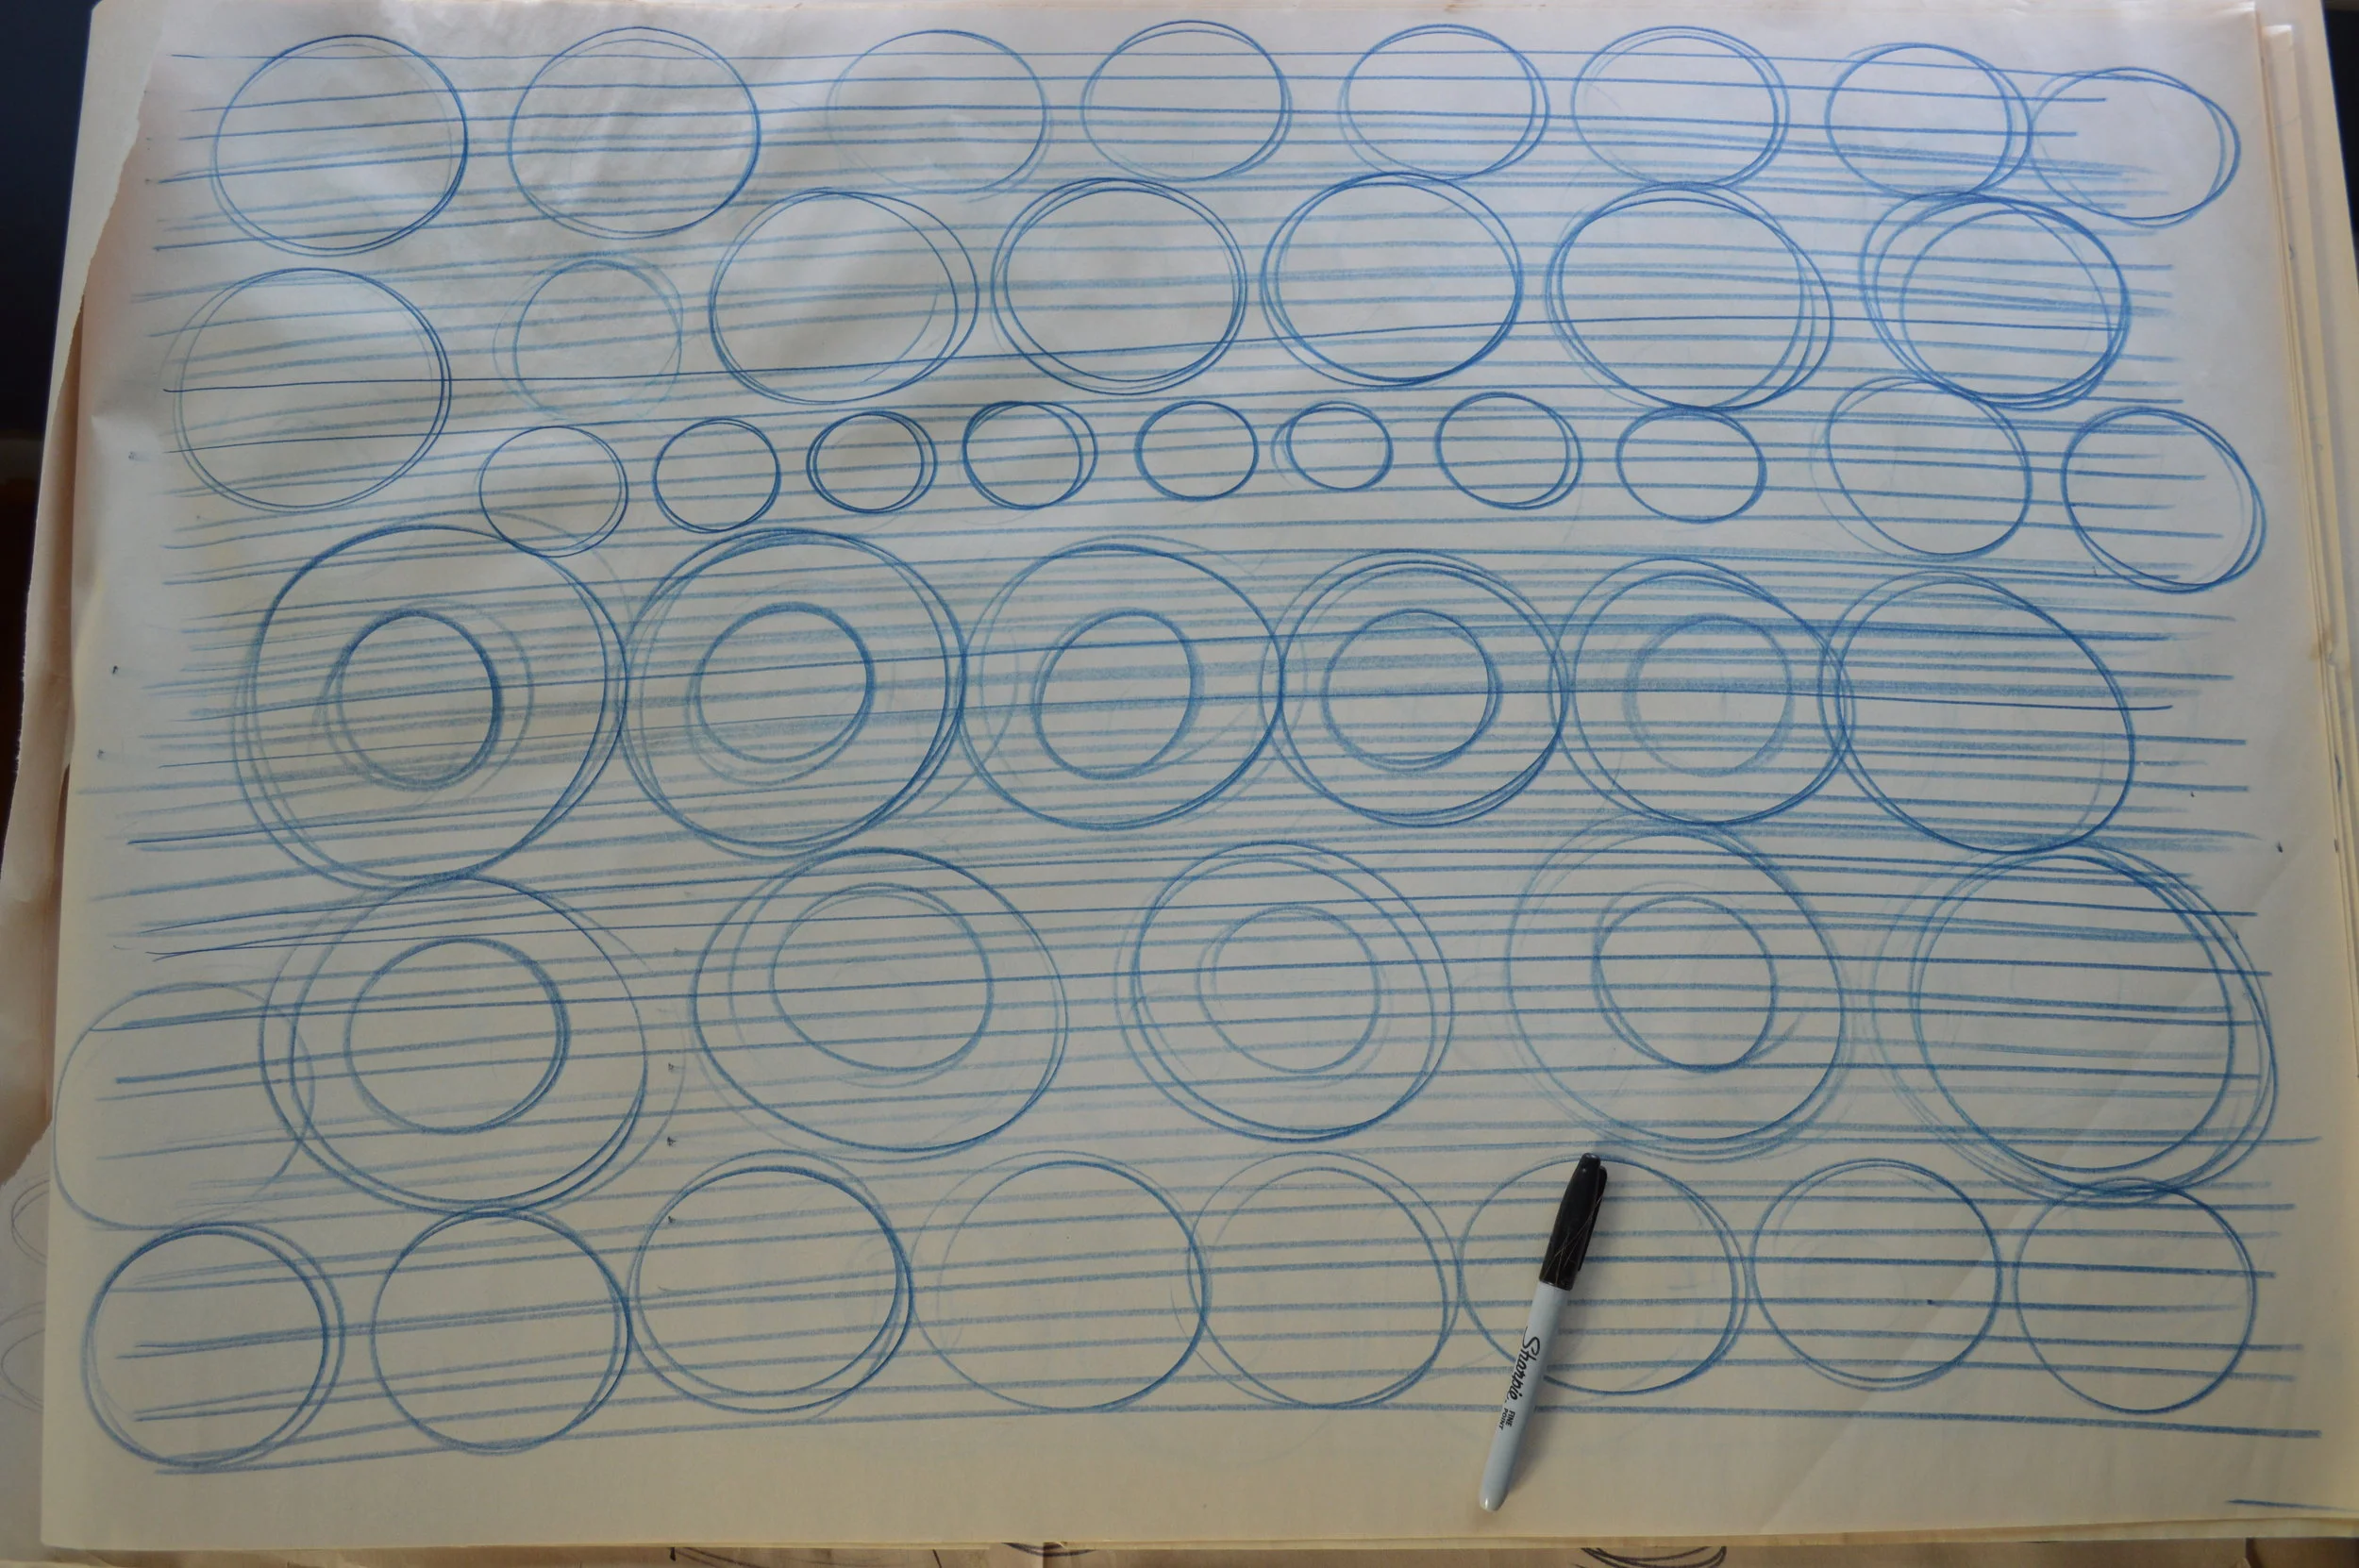


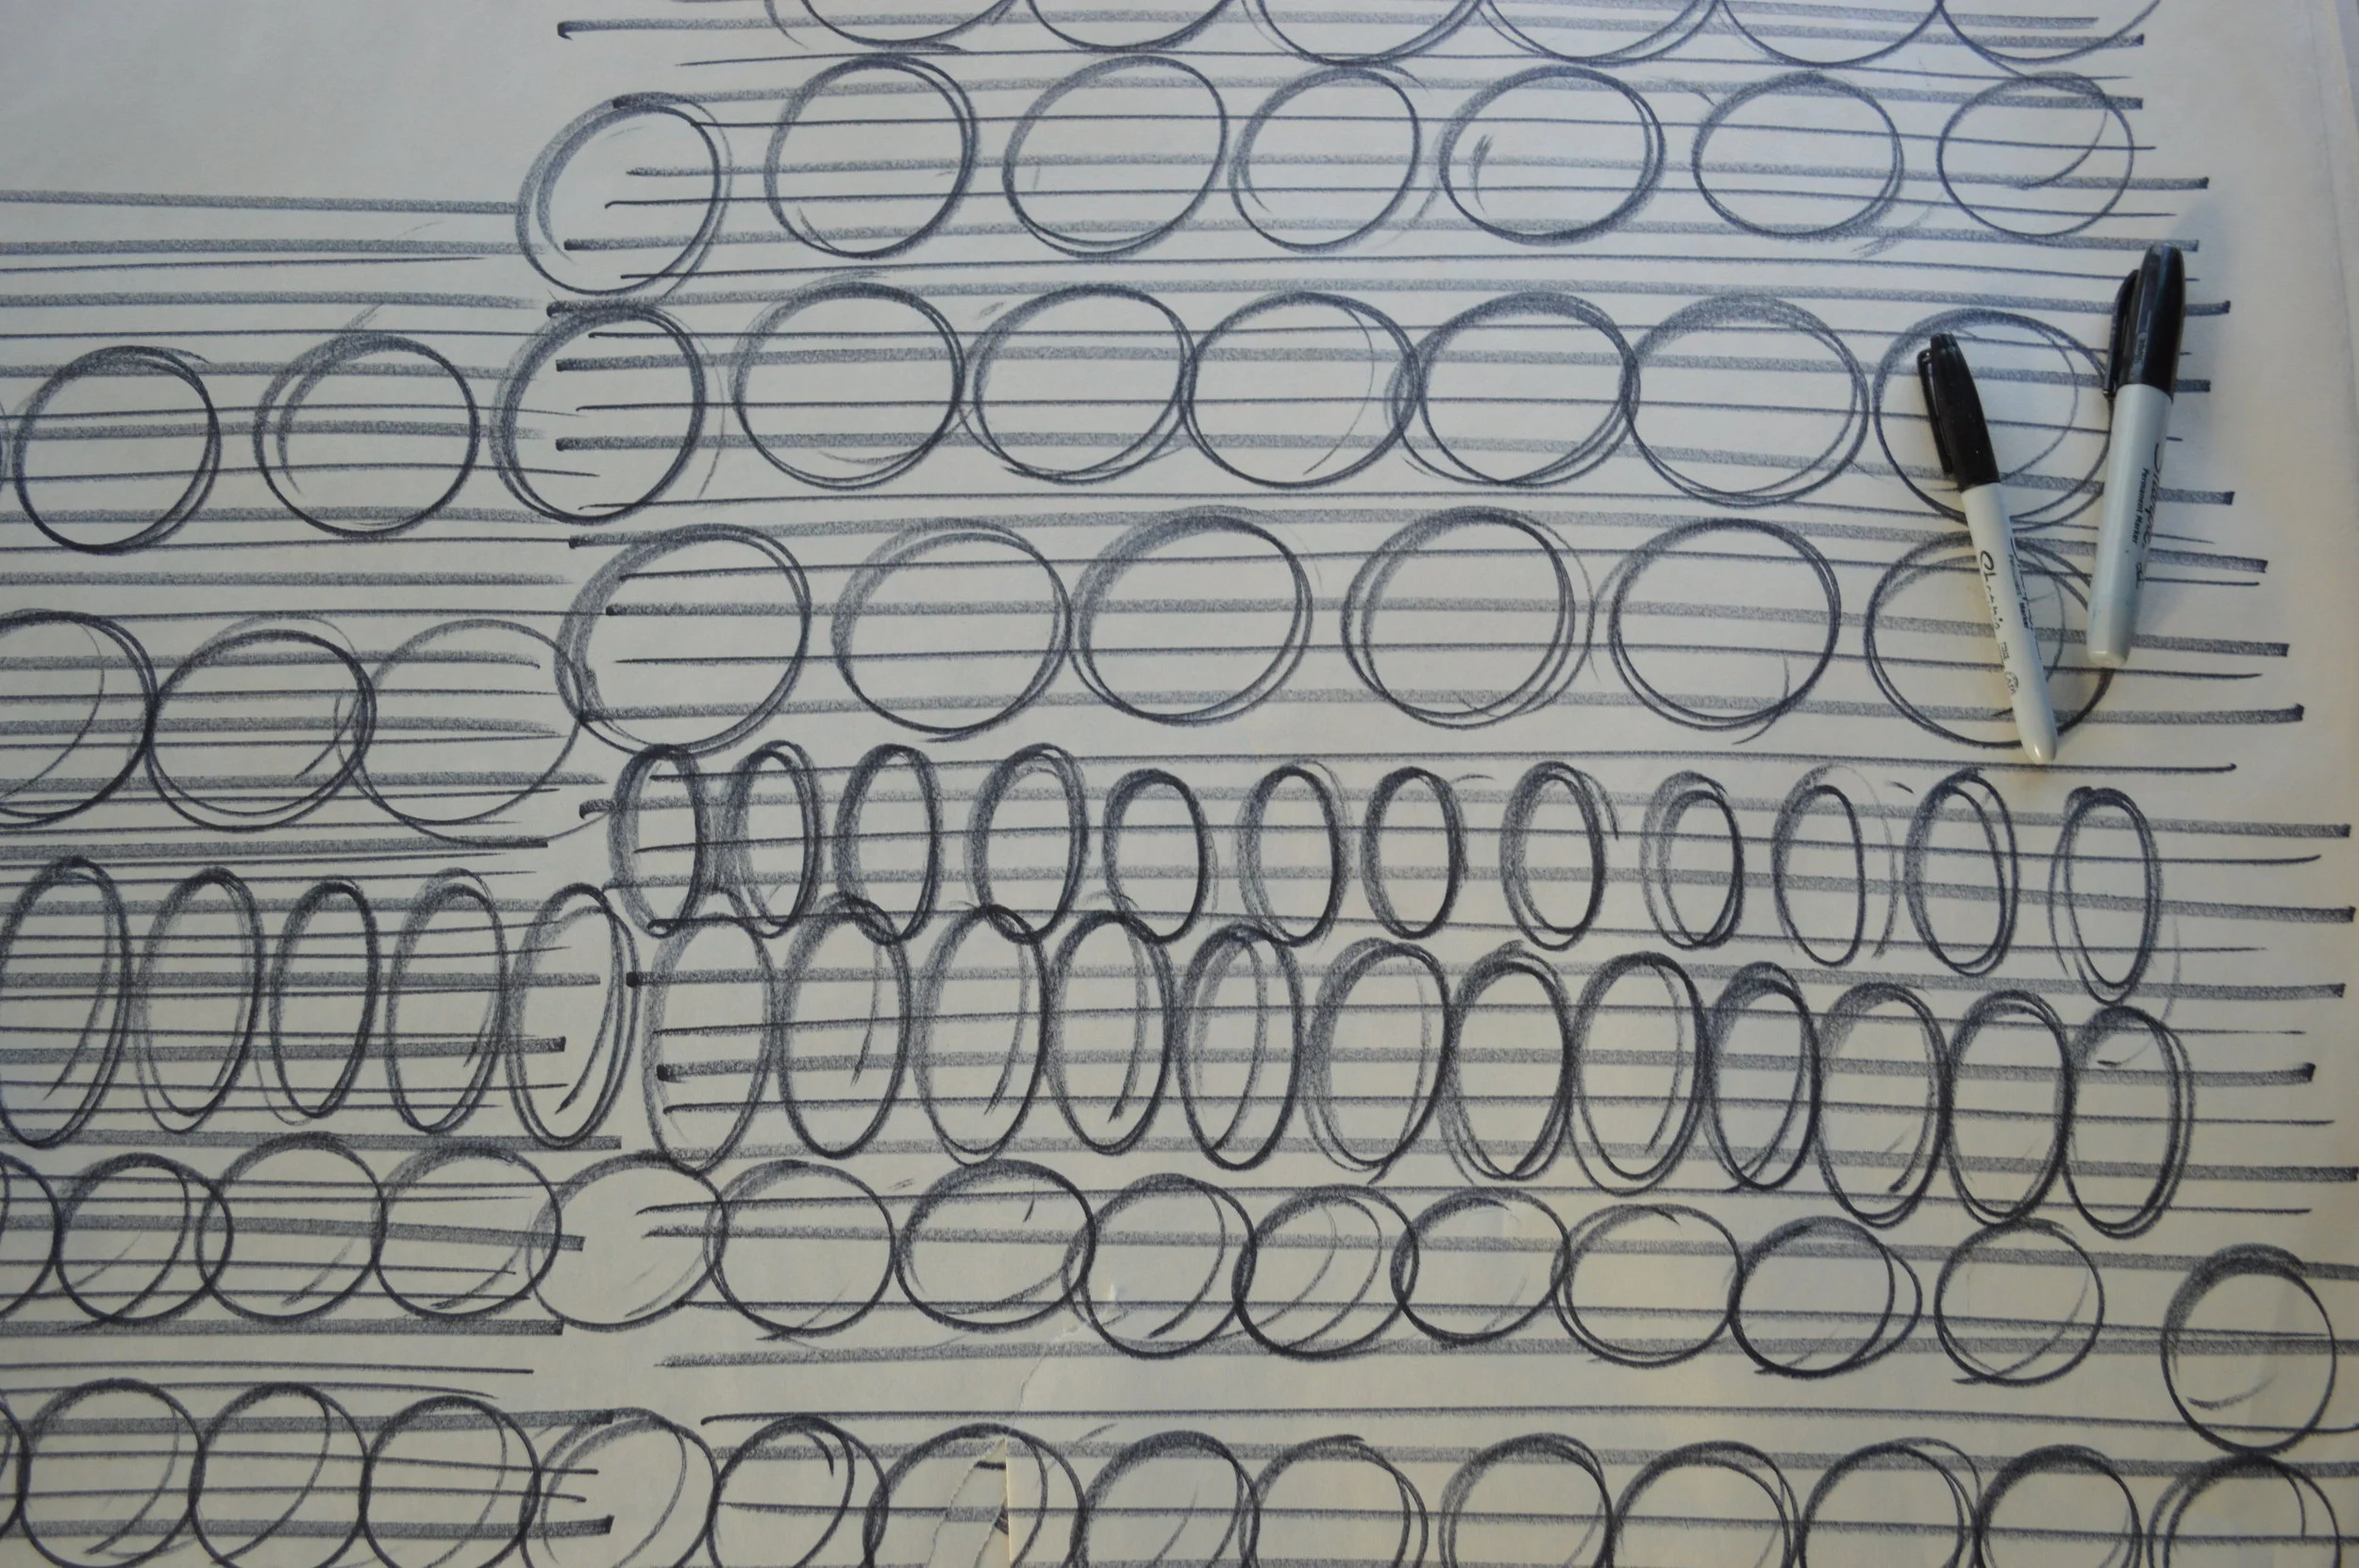

After two weeks of three pages or more, I moved on to large scale. I gave following the specifics of the previous drill, to find a new focus. I transitions to circles instead of ellipses, then pushed to use my entire arm to draw straight lines (horizontal and vertical). The change from using wrist/elbow muscle memory to shoulder has a different effect and more need for control, which has improved my coordination and consistency to this day. This didn’t have as serious a regiment of three pages per day, typically it was one full page as a warm up, then off to drawing more interesting idea and concepts.
Take notice, there is a different type of enthusiasm while drawing large scale. The lines are much faster, more expressive. The need to control that speed and dexterity is pivotal during these exercises. It got to a point where I didn't follow the rules exactly outlined and I jumped from type of exercises, while still focusing on very specific attributes. Lines, circles, and ellipses.
Pro tips: It may help to draw two dots, where you will start and end the line. Don’t follow the marker with your eyes, look at the endpoint where the line will stop.
Materials:
- 18x24 Newsprint Pad (4-5 of them)
- Fat, sharp tip sharpies and fine tip sharpies (brand new or old)
Actions:
- Variations of the previous drill while standing (standing is key)
- Line drawings (horizontal and vertical) across the entire page, 3-4 tracings of the original line
- Circles, ellipses, hatching
- Using controlled speed, going faster than you normally would, but keeping consistency
- Add some 3/4 view perspective cubes, if your feeling brave
Takeaways:
- Use of controlled speed to push how fast you draw and dexterity
- Muscle memory starting from the shoulder, compared to the elbow or wrist
- Getting freehanded perfect circles consistently
- Straighter lines from every angle
- Gaining confidence in some perspective with cubes
- Learning to precisely eyeball distances and measurements
STEP 3: HAND DRAWN COMPUTER GRIDS


IN-BETWEEN PRODUCT SKETCHES
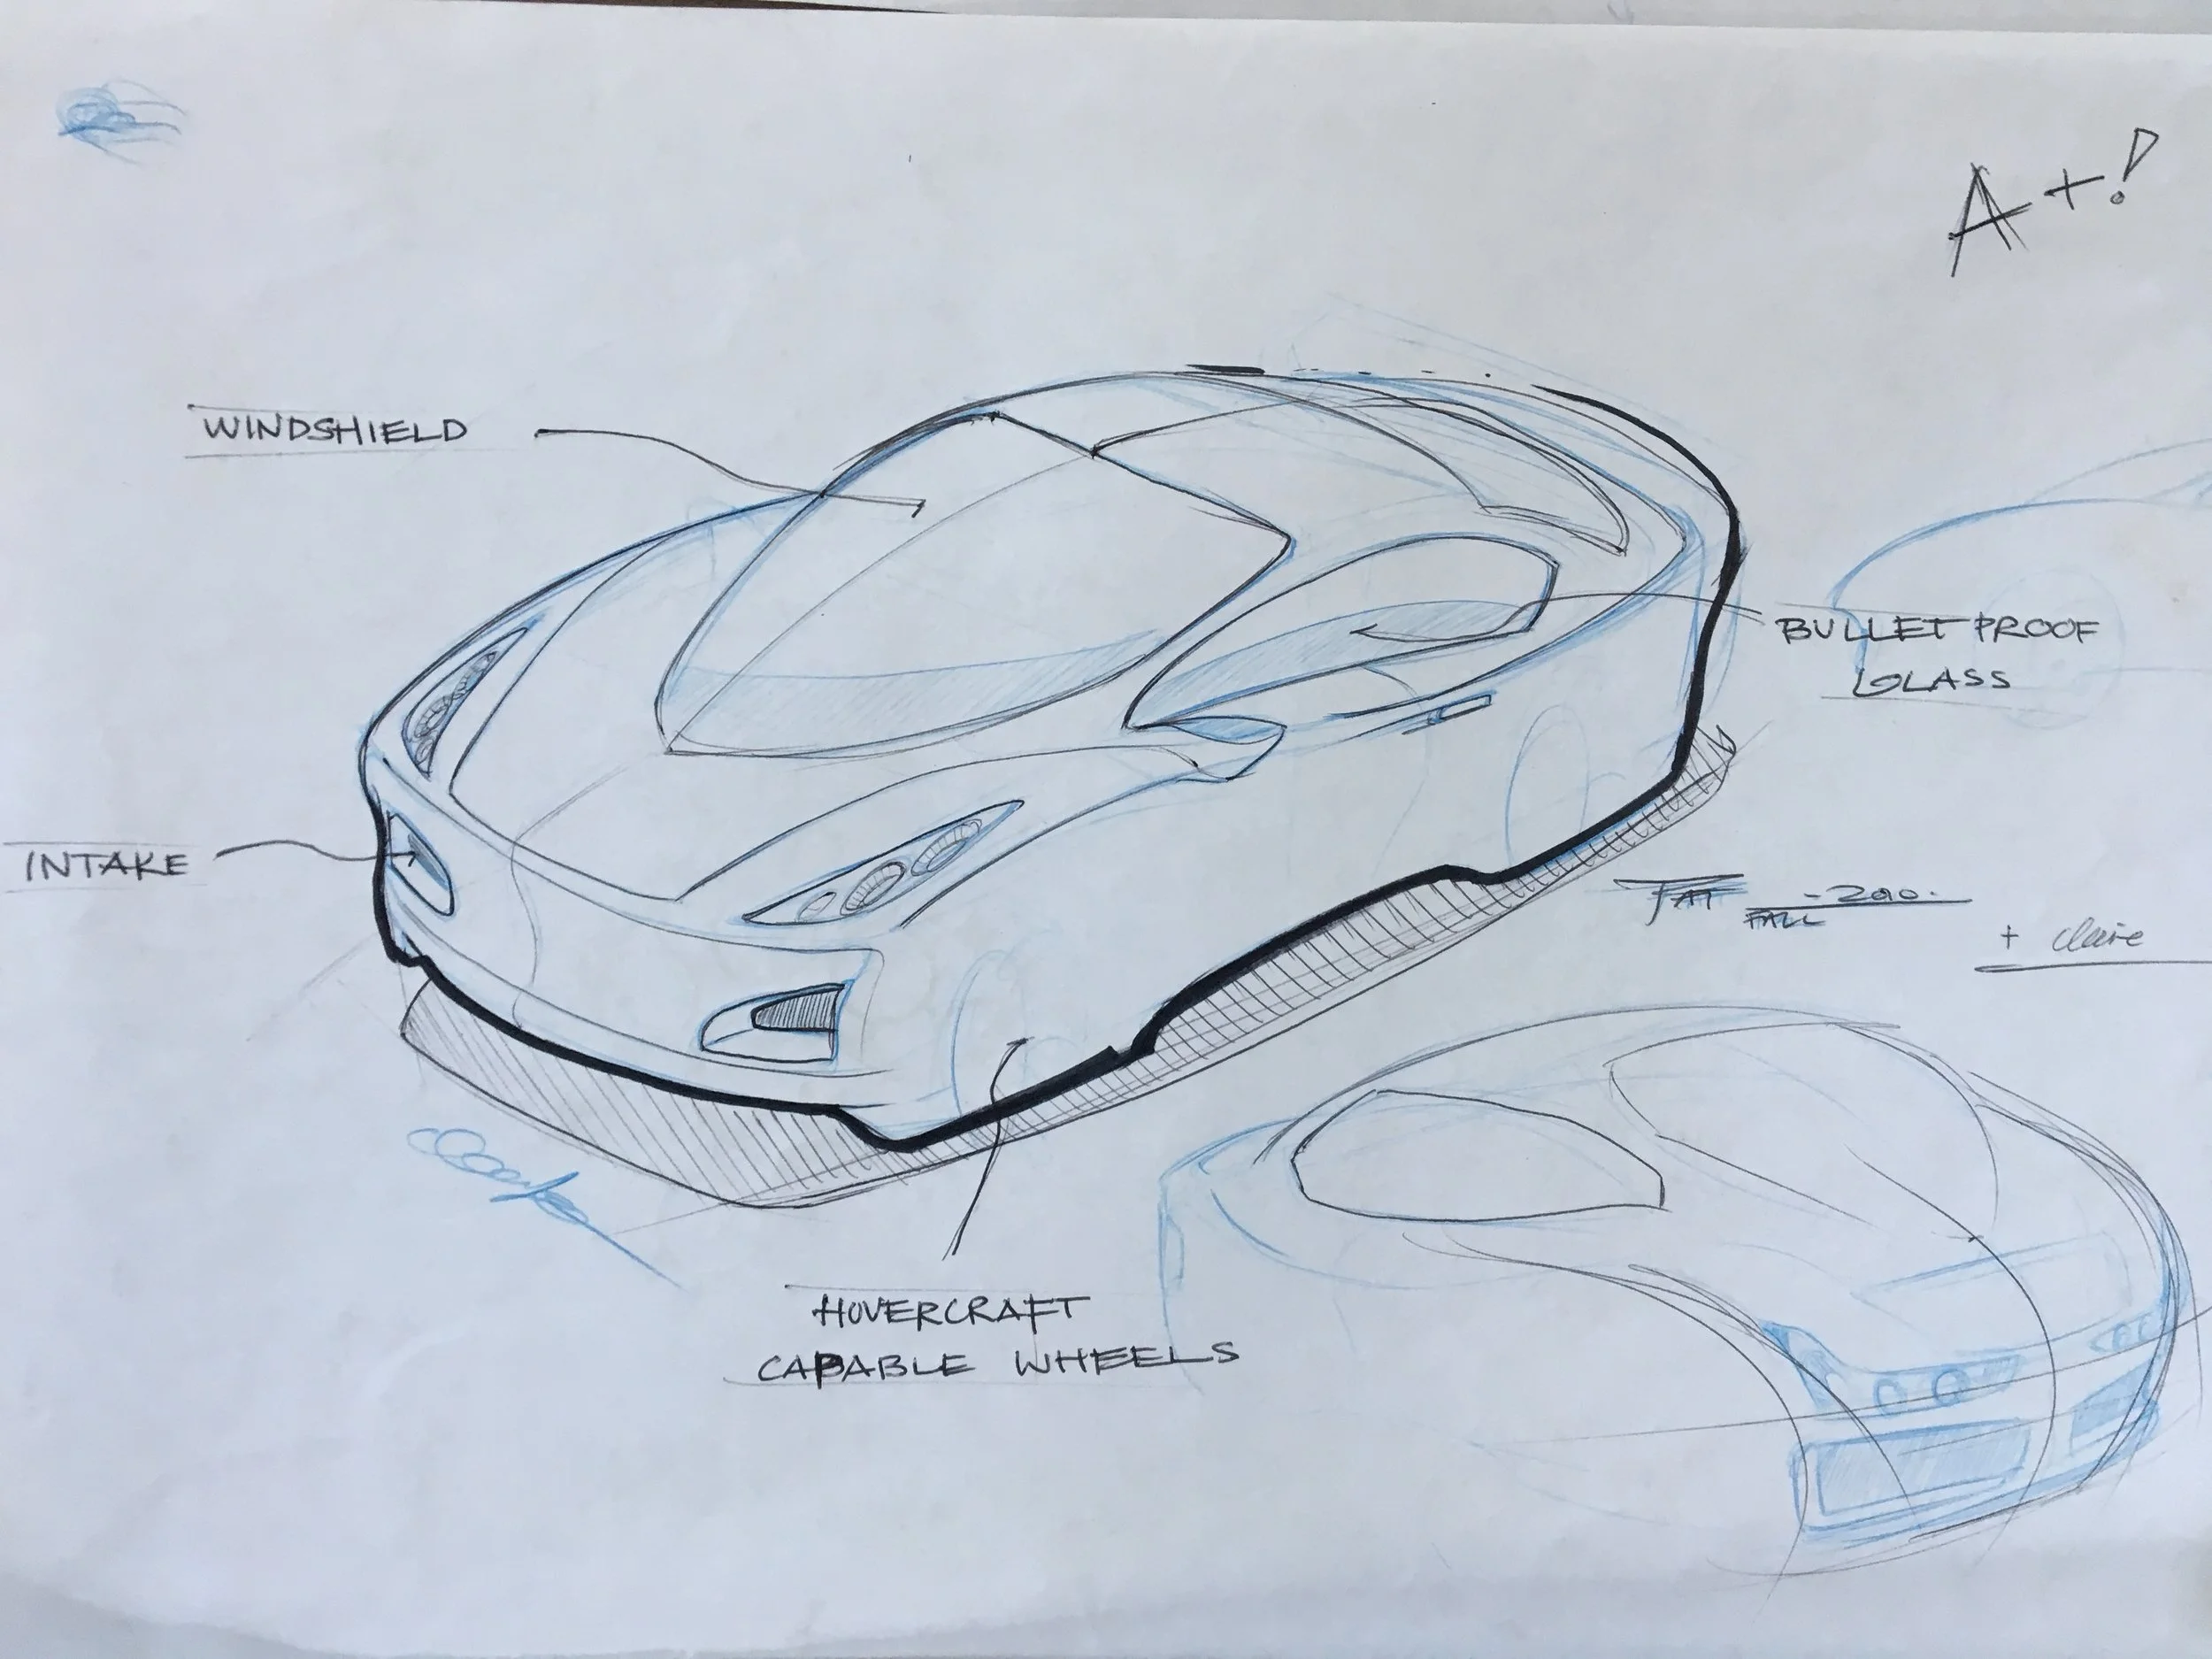


The exercises get a bit more interesting from here on out. I’d like to note, that during all of these drawing sets, I was still working in perspective, drawing products, cars, cellphones, lamps, etc. to continually improve other areas, as well as the technical aspect of drawing.
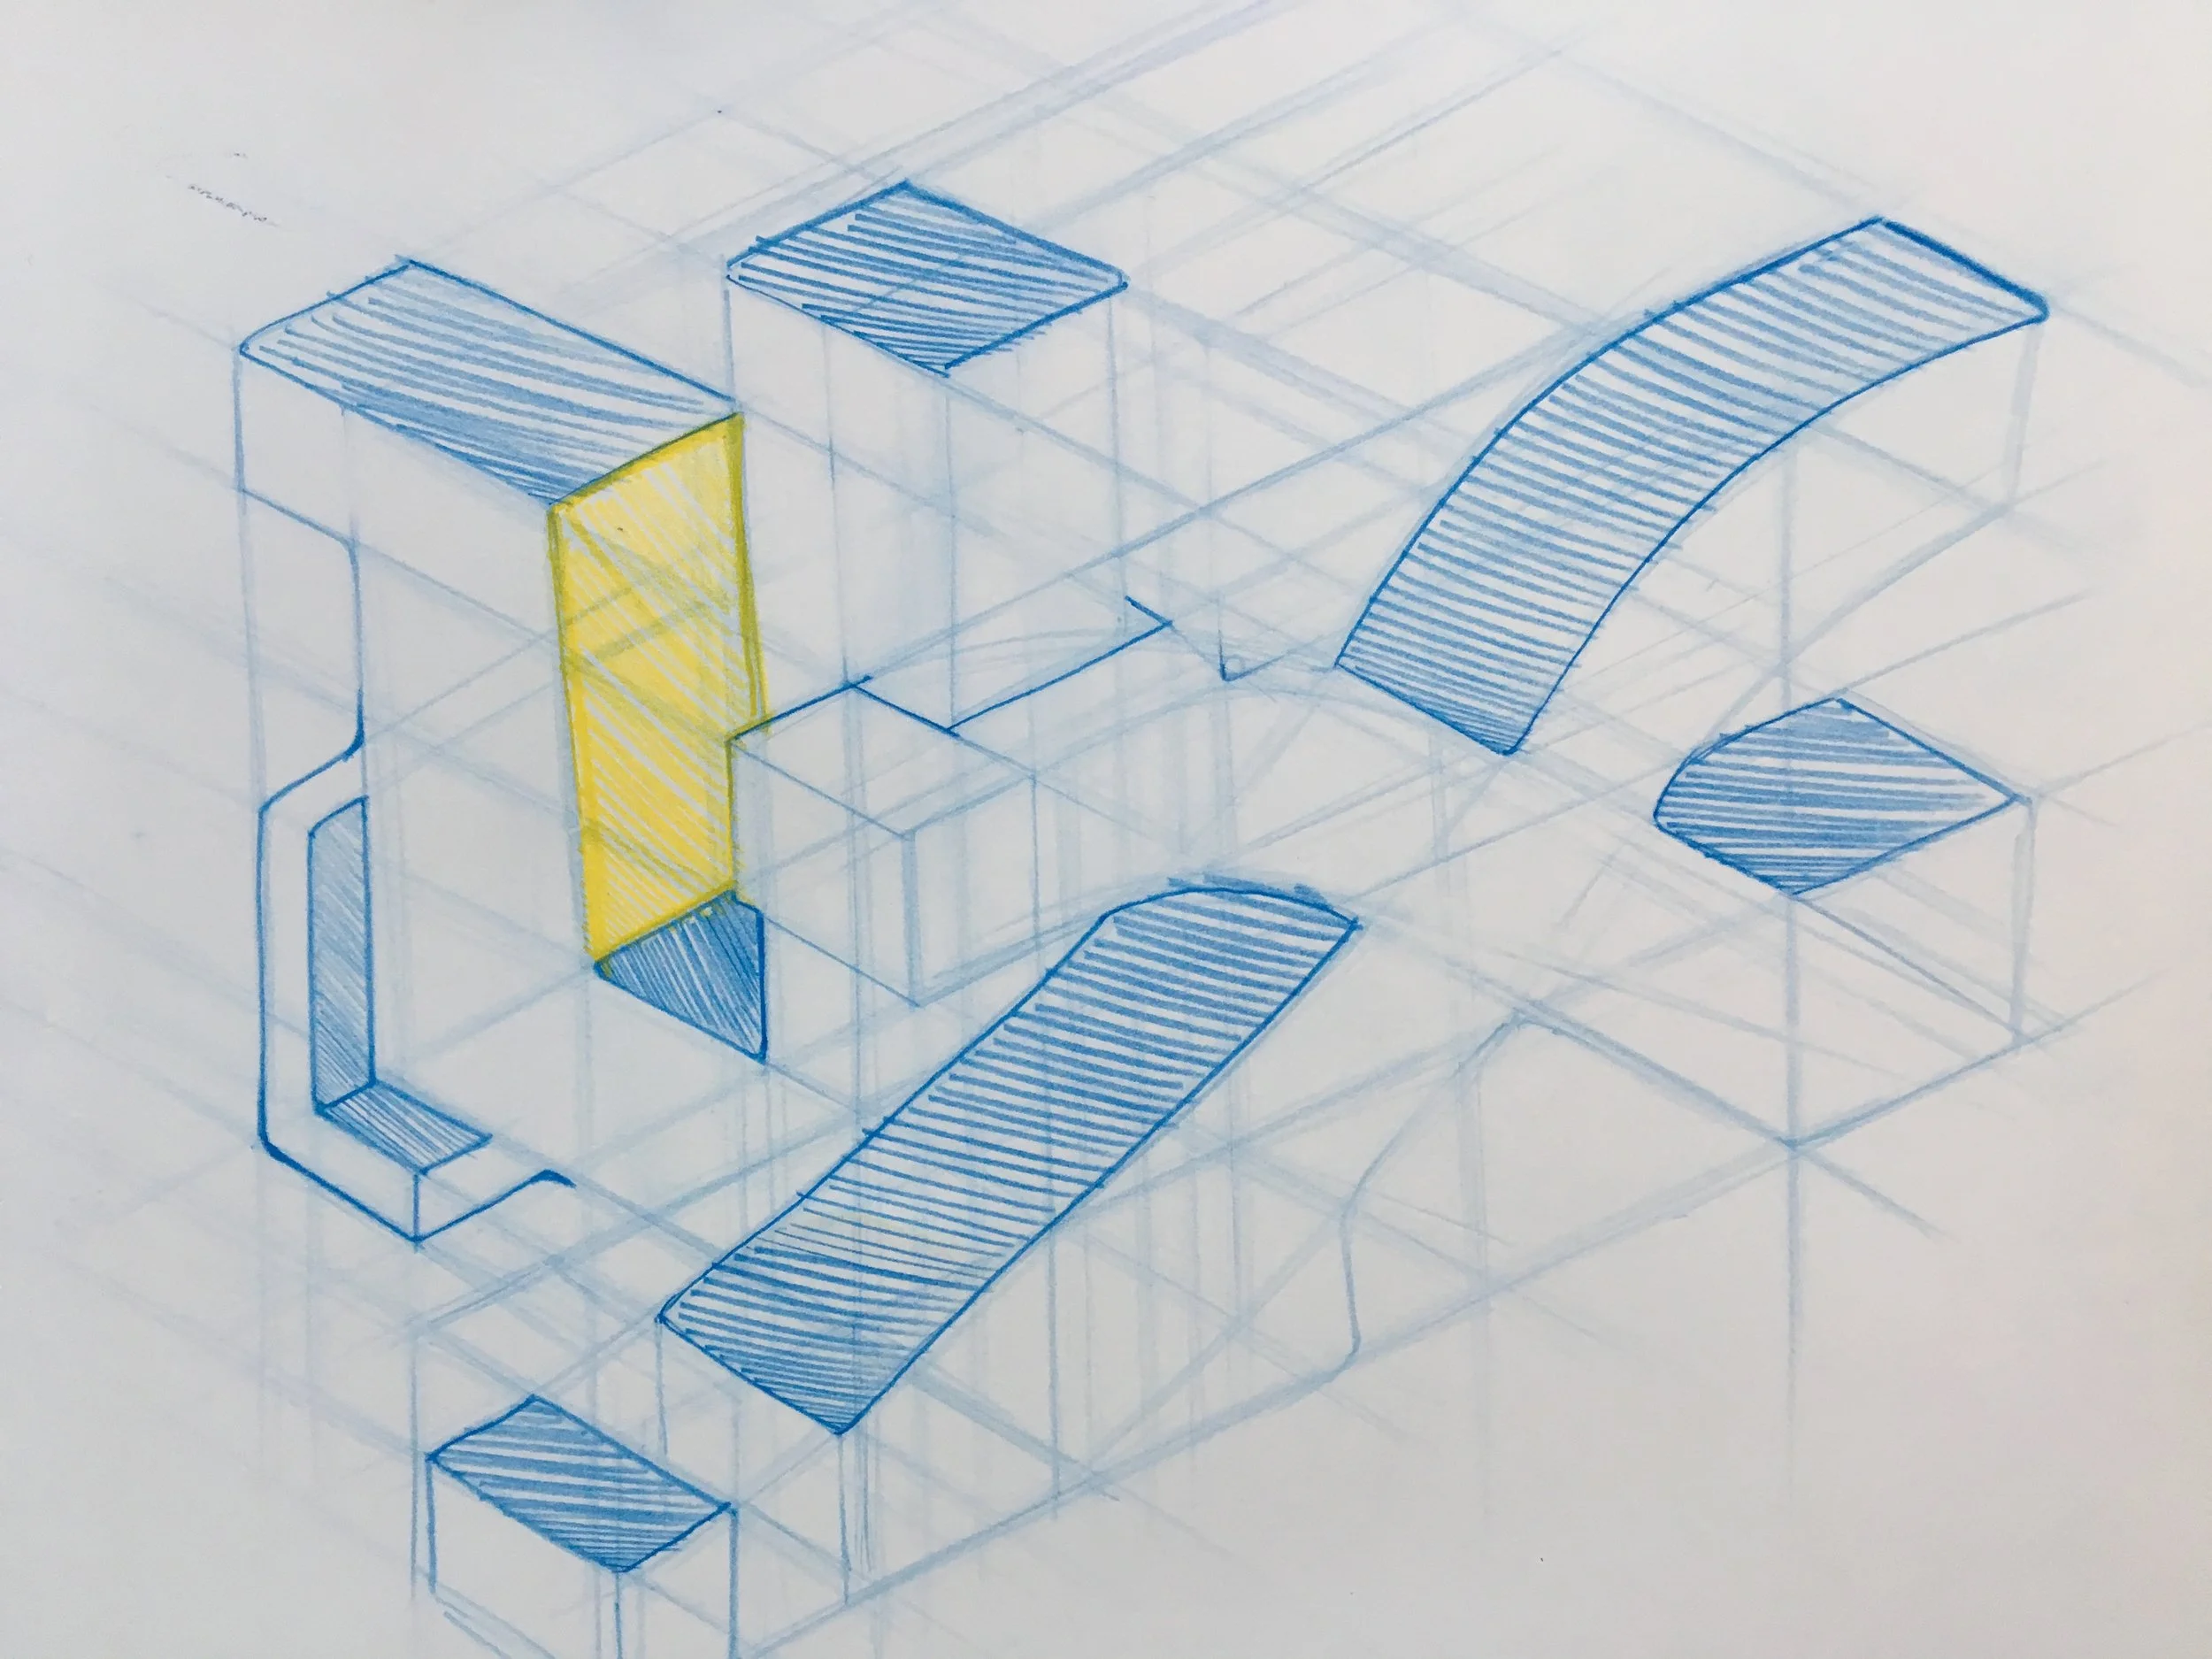
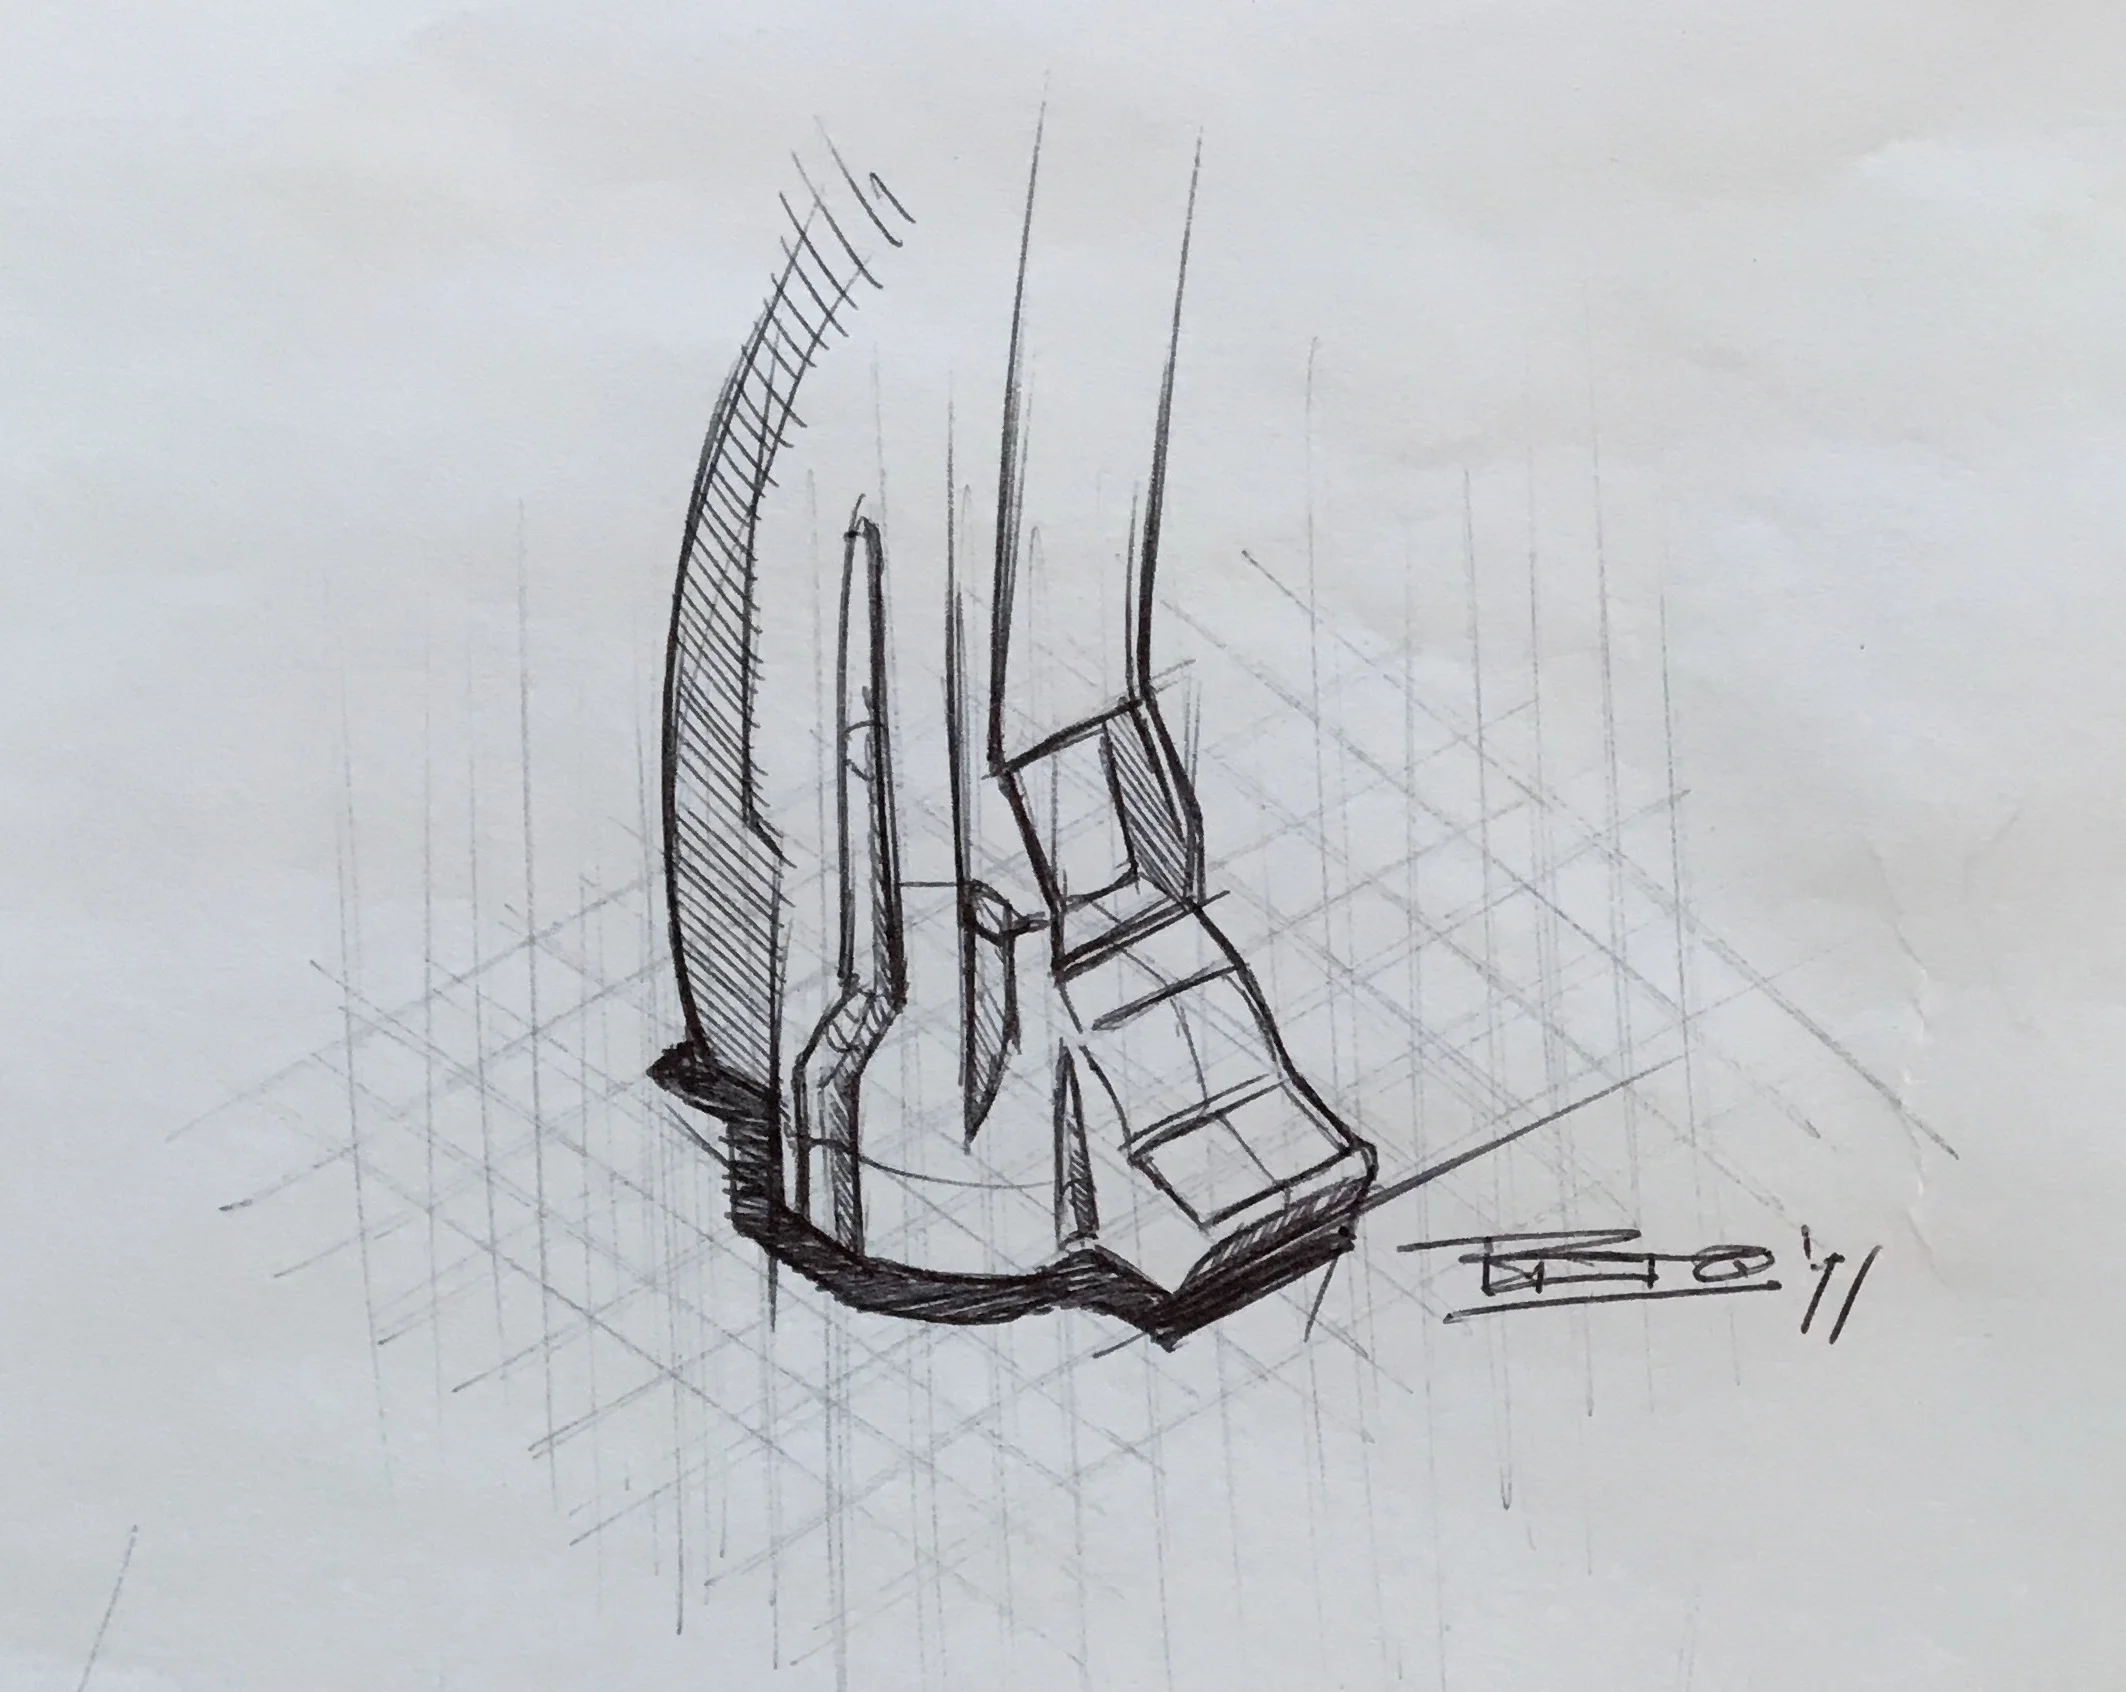
After working diligently towards focusing on lines, ellipses, line quality, and spacing, I moved towards creating grids. I found that drawing accurately in perspective was arduous. To help improve that area I figured drawing 3 dimensional planes simple with lines may help reinforce the understanding of create accurate designs in perspective.
These grids were all done freehand, with no tools for assistance. I would occasionally bounce from these types of grids, to drawing cubes more regularly, and then pushed it farther with creating strange, abstract shapes within those grids I produced.
Materials:
- Ball point pen
- Computer copy paper
- Various Colored Pencils
Action:
- Single line strokes in a graph-paper like grid, approximately 4-7 inches in length
- Eyeballed estimate of 2 point and 3 point perspective cubes and rectangular prisms
- Various basic and complex styled shapes within the grids generated
Takeaways:
- Precision, precision, precision
- Understanding of complex forms within accurate perspective grids
- Manipulating and creating forms based within those grids
- Visualizing 3 dimensional forms prior to creating them on paper
- Solid grasp of various forms of perspective